
 (photo by Jackie Lams)
You can snag it as a downloadable PDF from the front page of their website but I thought I would post the instructions here since I think its pretty groovy and I think you will too.
Its a rather long tutorial so I really recommend grabbing the PDF off of 3CS's site, its a handy reference rather then having to come back to the blog post.
So without further ado, here are the instructions on how to make yourself your very own screen printed pillow cover. :)
I admit that I have no limit to the amount of things that I will screen print. I can't help myself, its an obsession that I will find any excuse to indulge. I guess its not surprising that it has made it into my home decor.
I've long admired the stylish throw pillow covers sold in all the fancy home dec catalogs. I've not admired the prices, though. One of the gifts of being an artist is that we can make things for the faction of the cost that it runs in the retail shop.
I decided it was time to whip out the screens and make a pillow cover of my very own. I thought you might like to see how its done too because there is no way I'm stopping at one and I'd love some company for my obsession! :)
Here are the supplies you will need:
Its a rather long tutorial so I really recommend grabbing the PDF off of 3CS's site, its a handy reference rather then having to come back to the blog post.
So without further ado, here are the instructions on how to make yourself your very own screen printed pillow cover. :)
* * * * * * * * * * *
I admit that I have no limit to the amount of things that I will screen print. I can't help myself, its an obsession that I will find any excuse to indulge. I guess its not surprising that it has made it into my home decor.
I've long admired the stylish throw pillow covers sold in all the fancy home dec catalogs. I've not admired the prices, though. One of the gifts of being an artist is that we can make things for the faction of the cost that it runs in the retail shop.
I decided it was time to whip out the screens and make a pillow cover of my very own. I thought you might like to see how its done too because there is no way I'm stopping at one and I'd love some company for my obsession! :)
Here are the supplies you will need:

* fabric (I'm a cotton girl but use what you love)
* thermofax screens
* screen printing paint
* 14" square pillow
* 3/4" fusible Velcro
* 1.5" sponge brushes
* rotary cutter / mat / ruler
* sewing machine
* thermofax screens
* screen printing paint
* 14" square pillow
* 3/4" fusible Velcro
* 1.5" sponge brushes
* rotary cutter / mat / ruler
* sewing machine
The instructions for this tutorial are written for a 14" square pillow that I bought at Joann Fabrics. (40% off coupons rule.) But you can adapt it to any size pillow that you like.
And a quick word about fabric. You do NOT have to use hand dyed fabric. Its nice, its cool, its groovy. BUT if you aren't inclided toward making the mess or bearing the cost, screen printing plays very nicely with commercial fabric as well. I use both you can too. There's no rule to what you have to use, just make sure you like it.
Same with the screens/imagery I used. If you don't dig it, go your own way.
Now let's make a pillow cover!
STEP 1
Cut a 15" squrae of fabric for the front of your pillow. (I like a 0.5" seam allowance.)

* * * * * * * * * * *
STEP 2
We're going to print three layers of images for this pillow.
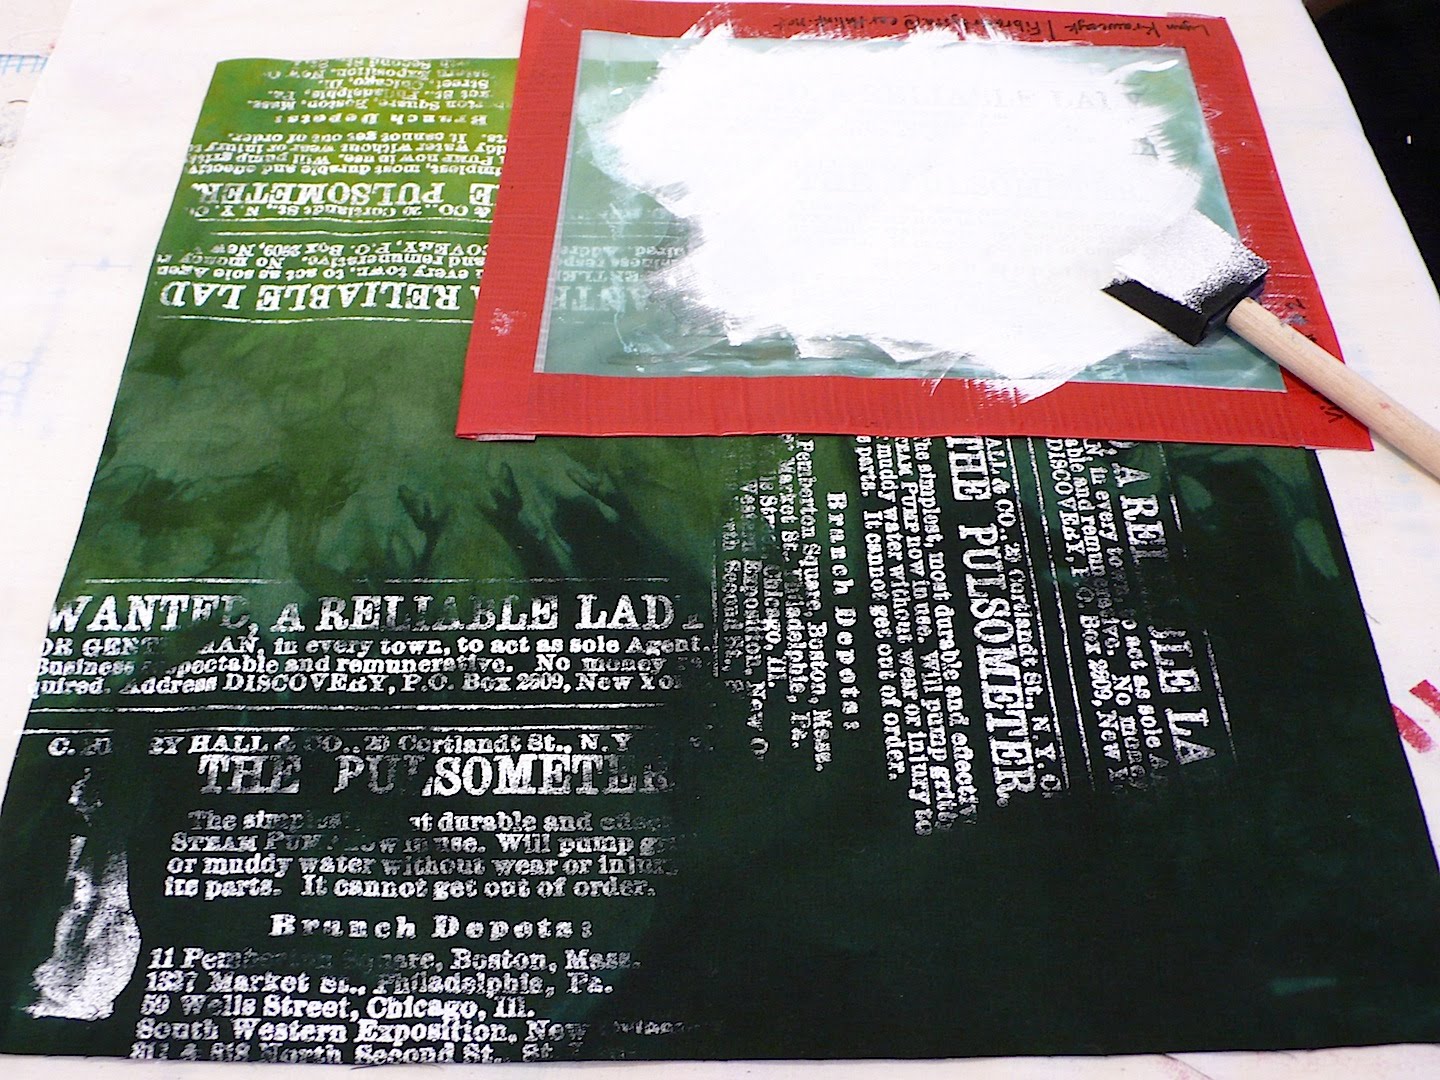
The first layer is scuff printed. I chose a screen with text on it. Scuff printing is the process of printing partial or ghost images. They are accomplished by using very little paint on your screen and only printing portions of the image rather then the whole thing.
Allow your print to dry, it doesn't take long. This is the background, so don't judge how it looks just yet.

Often when you start laying down the layers, the first one doesn't look that impressive. Just keep going. Its like cooking. Those onions and tomatoes aren't so exciting on their own but put them in chili and you really have something. Same philosophy goes for creating layered prints.
* * * * * * * * * * *
STEP 3
I like to get a clear sense of where the center is on the fabric. I place paper where the seam allowance will be and then place the screen in the center of that.


* * * * * * * * * * *
STEP 4
The next two layers of the printing are solid printing. (This is shown in Part 2 of my Basic Screen Printing video on YouTube.)
Solid printing means that we are printing a clear bold print of our image.

This time I didn't wait for the print to dry. I printed the final layer over top of the previous wet print. Because the other image was still wet, it will create a monoprint on itself on the back of the next screen. This creates shadow prints on other areas of the fabric when I lay the screen down to print. I like this but if that doesn't float your boat, wait for each layer to dry in between.

Now that we've printed three layers, we have a pretty good looking pillow top. Were going to allow this to dry completely.


* * * * * * * * * * *
STEP 5
While our print is drying, let's move on to making the back for the pillow cover. Its constructed of two pieces. Cut out one piece of fabric in the following sizes:
Backing piece #1: 15" wide x 10.5" high
Backing piece #2: 15" wide x 12.5" high
Along the longer side of the fabric (the 15" side), fold the seam up 1.5". Do this twice on each piece, using up 3" of the length of the fabric. (This is where the Velcro will be added later. I call this the Velcro seam.)

* * * * * * * * * * *
STEP 6
Take the Backing pieces to the sewing machine and stitch down both edges of the Velcro seam that you create din Step 5.


* * * * * * * * * * *
STEP 7
Give your printed panel a little pat to see if its dry. If it is, heat set it. This will make the paint permanent and washable. Simply iron the piece on the reverse side for a minute.

* * * * * * * * * * *
STEP 8
Now we are ready to assemble the pillow cover. Lay the pieces right sides together, overlapping the Velcro seams of the backing pieces as shown in the photo below:

Pin everything together and give it a whirl through the sewing machine, sewing a 0.5" seam allowance all the way around the perimeter of the pillow cover.

* * * * * * * * * * *
STEP 9
The next step is to add the Velcro to the Velcro seam. I'm a big fan of fusible Velcro, so easy to add to your projects. I have a little trick to make sure that everything lines up perfectly. Begin by putting the loop and mesh side together and cutting them into four small pieces, about 1" wide each.


* * * * * * * * * * *
STEP 10
Remove the sticker from ONE side of the Velcro and place the sticky side down along the edge of the Velcro seam.


* * * * * * * * * * *
STEP 11
Once all four pieces are placed, remove the sticker from the other side. Take care to hold the piece in place when you do this so you don't lift if off the fabric.
Lay the overlapping Velcro seam on top of the exposed sticky side of the Velcro pieces and press them with your hand so that they make contact with the fabric.

* * * * * * * * * * *
STEP 12
Iron the Velcro pieces for 90 seconds (directions from the package).

Give them a moment to cool and then you can pull the apart. Viola! Perfectly aligned Velcro closures!

* * * * * * * * * * *
STEP 13
Shove your pillow form into the pillow cover, giving it a good tug here and there so that the pillow sits proper

SIT BACK AND ADMIRE YOUR WORK! :)
4 comments:
Beautiful! And you make it look so easy. One could end up with a house full of pillows....
The pillow is very cool, so many possibilities. But you have opened my eyes to fusible velcro,I didn't know it existed, what a great idea!
Is there any further reading you would recommend on this?
Amela
t-shirt printing northampton
Nice Pillow Cover Printing blog and i will share to my friends. Also i suggest Textile Printing Services.
Post a Comment