
I pondered, especially since today's post is supposed to be a Printed Project Sunday post. I thought that maybe it would be fun to combine my three loves and this sunday post into a craft tutorial project.
Without further ado, I bring you the skelly plushie (and the directions on how to make your very own):

This plushie is made using the skelly duo screen designed by Leann Meixner. I split the design into two individual skellies. I experimented with printing them when they were on the same screen and it was bit torturous so I thought I'd make it easier on all of us.
And if you aren't inclined to make one of your own, head on over to my etsy shop and pick one of them up all ready to go!
Before we get started, let me get the business end of this out of the way. These are fun to make. Give them for gifts for halloween instead of candy (gift giving does not require a license fee). BUT if you want to make them to sell, please remember that there is a one time $25 license fee in order for you to be able to do so. And give Leann credit as the designer, she rocks and the whole world should know it.
Okay, now that that's done, let's get to it!
Step 1
I chose to print my skellies on black cotton but you can certainly print on any color fabric you like. When I make plushies, I cut the fabric in one hunk and I always cut way more then I need (traumatic events of not enough fabric for seam allowances have ensued and it ain't a pretty thing). For the skellies, I cut a 14" wide x 10" high piece of black cotton.

* * * * * * * * * * * * * * * * * * * * * * * * * * * * * * * * * * * * * * * * *
Step 2
Screen the skelly in your paint color of choice.


I tried the neon paints on the black and they didn't work well. The colors that I used for the ones shown here and in my etsy shop were screened with the colors milk, envy, banana peel, strawberry shake, blue hawaii and fairytale.
* * * * * * * * * * * * * * * * * * * * * * * * * * * * * * * * * * * * * * * * *
Step 3
Heat set your skelly completely before moving on to the sewing stage. (I like to heat set on the opposite side of the fabric I print on.)

* * * * * * * * * * * * * * * * * * * * * * * * * * * * * * * * * * * * * * * * *
Step 4
Fold the fabric in half, right sides together, and pin to keep it from shifting during sewing.

Drag your plushie over to your sewing machine and begin sewing around the edges of the printed design. I sewed about half an inch around the outline and just went with it, I didn't worry about making it perfect. When you look at the ones in the shop, you'll see that each one is different, a little quirky and totally individual.

* * * * * * * * * * * * * * * * * * * * * * * * * * * * * * * * * * * * * * * * *
Step 5
I usually sew my plushies completely shut and then cut a slit on the backside for turning and stuffing.

If you don't like that option, leave an opening in the seam during sewing to use to turn and stuff your skelly.
Trim away excess fabric and clip any curves to ease turning your skelly right side out:

* * * * * * * * * * * * * * * * * * * * * * * * * * * * * * * * * * * * * * * * *
Step 6
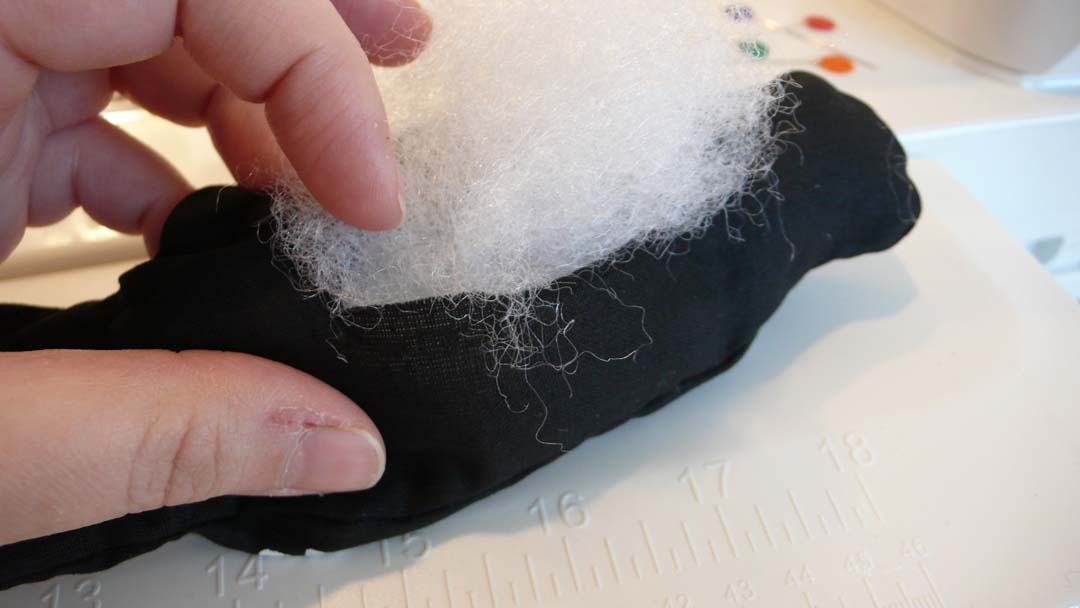
Stuff your skelly. You'll be shocked how much polyfill you can cram into this little plushie. Keep going until you're happy with the level of stuffiness. If you like firm solid plushies, stuff a lot. If you prefer squishy, don't use as much.
* * * * * * * * * * * * * * * * * * * * * * * * * * * * * * * * * * * * * * * * *
Step 7
Hand sew shut the turning/stuffing opening. I like to use a size 8 perle cotton. Feels sturdier to me.


You can clean up stray polyfill fibers with some scotch tape.
Since I cut open the back, I put my label over it to hide it.

And there you have it! A skelly ready to do your bidding!

And what exactly do skellies enjoy doing? Here are a few examples.
They try to blend in with other chachkis:

They enjoy traveling to parties in packs:

They like to be hugged:
 That's Leann!
They enjoy sunbathing in public spaces:

They make bikers look tough:

Don't delay! Make yourself a gaggle today! Or swing on by the shop and pick one up to hang out with.

They make bikers look tough:

Don't delay! Make yourself a gaggle today! Or swing on by the shop and pick one up to hang out with.
4 comments:
OMG, Lynn, great photos!!
OMG Lynn.. great tutorial and what a great pic.. Yes those design's rock!
Love the biker photo! who'd knew? LOL
They're adorable!
I had to giggle at the last photo.
Brilliant, fun and so funky!! Thanks for sharing... and I really enjoyed your video tutes on Thermofax screen printing. Gonna have to give that a go!!
Post a Comment