

I bought new tennis shoes.
They were too clean and too plain. Thing is, I buy the boring colors because quite often my only other options involve glitter or strange buckles. But I got to thinking this time around, I've got skills. I could turn them into something far more interesting all on my own.
I admit I was a little apprehensive. I've never tried to screen print shoes before but I figured what the heck? What's the worst that could happen?
I thought I'd walk you through how I made them in case you're like me and find yourself wanting shoes with a little more personality.
Hope you enjoy! :)
Materials:
* Canvas tennis shoes
* Fabric screen printing paint
* Tiny & Teeny Spiral Thermofax Screen set
* 1" wide sponge brush
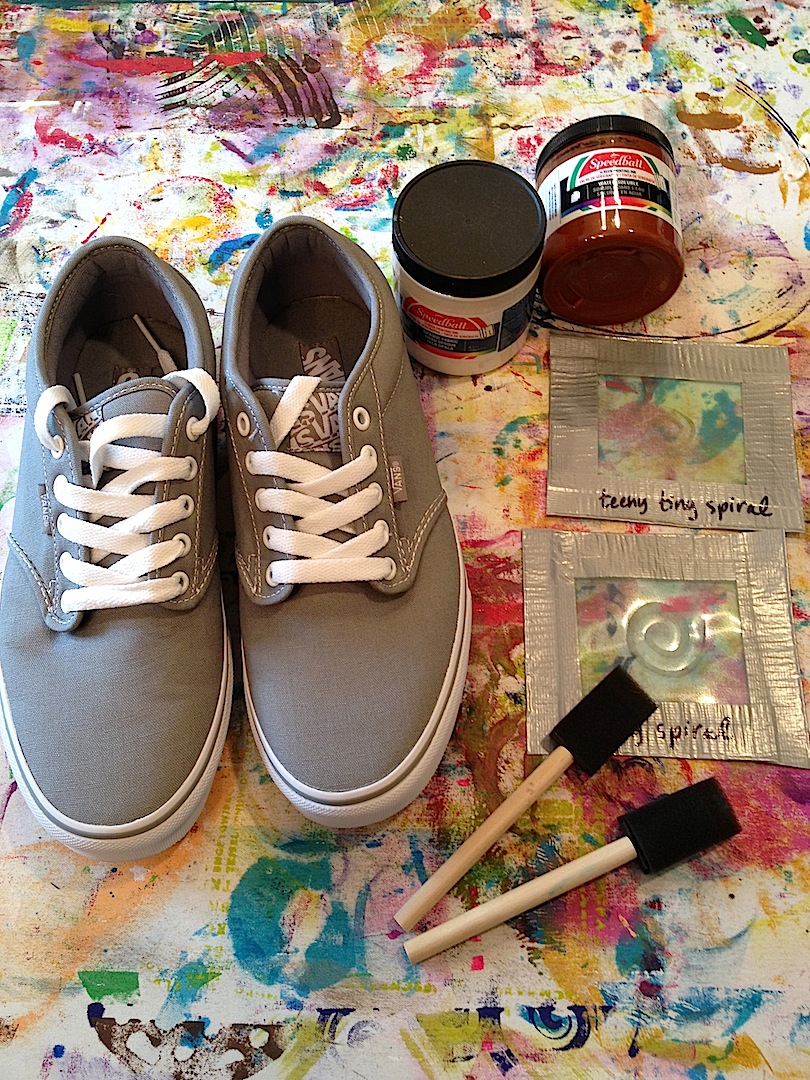
I have to say, the tennis shoes I buy are canvas. How "pure" fabric they are, I can't say. But they don't have a lot of coating on them so that's something to be aware of if you're striking out to buy a pair to print.
********************
Step 1:

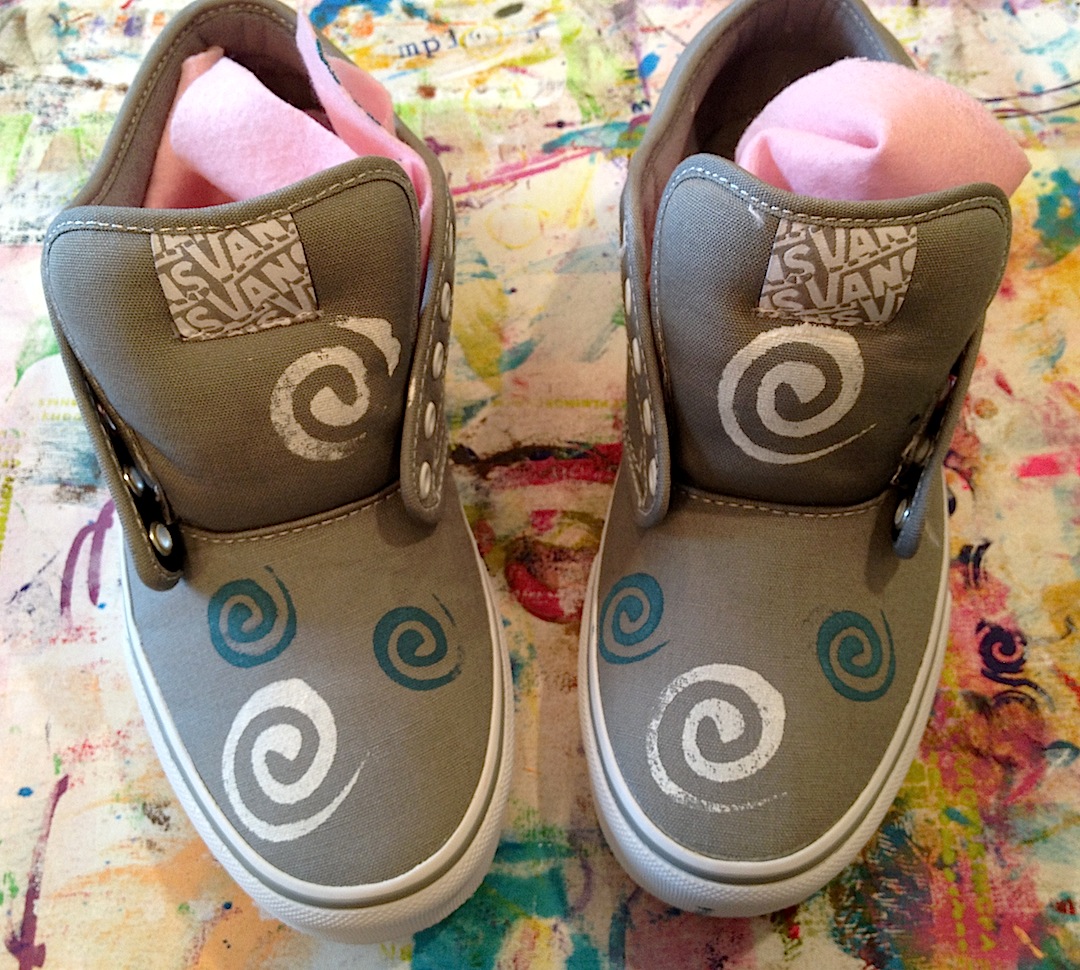
Stuff the shoes with something so they are firm. (I entertained the idea of wearing the shoes while I printed them. But I decided nothing good could come of it and opted to find a better solution.) I had some acrylic craft felt laying around the studio so I used that. The idea is just to give yourself a firm surface to print on.
********************
Step 2:

Place the tiny spiral on the shoe in a spot where you want it to go. Hold it down with one hand and print with the other:

Brush the screen printing paint through the screen with a sponge brush. Peel the screen back carefully and repeat on different places on the shoe until you're happy with the number of spirals you've printed:

The uneven surfaces of the shoe make it a challenge to get a really clear print. So I decided to embrace the imperfect print and just go with it.
Repeat the same printing on the other shoe. Let these spirals dry completely before moving on to more printing.
********************
Step 3:

Repeat the printing process with the Teeny Tiny Spiral in a different color. I chose blue this time around.
Add as many spirals around the shoe as you like. Repeat for the other shoe.
At this point, things look pretty good:
You could certainly stop here. But I kept looking at my print table and at the shoes and then back at my print table. I decided I want to mimic the wonderful chaos of the fabric that covers the table and did some more printing.

I printed four more layers:
1. The BE Thermofax Screen printed in brown paint.
2. The Birds on a Wire Thermofax Screen printed in black paint.
3. Swipe Printing in purple.
4. Swipe Printing in yellow.
LET EACH LAYER DRY BEFORE PRINTING THE NEXT. (Yes, I meant to shout that.)
Why no pictures? Because I got carried away and forgot to take them. (It was a paint bliss fit, I take no responsibility for myself when that happens.)
But I will offer some explanation.
You can see that the brown and black printed images are really smudgey. That's because the screens aren't small like the spiral ones and trying to force them around the shape of shoe proved to be a serious pain in the you know where.
What I ended up with was really messy prints. I'm okay with it, I like the look but you need to be aware of it if you like clear neat prints - not sure you'll get them with the larger screens.
Once I realized I had gone the messy route, I decided to just go for it. I did Swipe Printing first in purple and then in yellow. What in the world is Swipe Printing? Dip the end of a sponge brush into paint, dab it twice lightly on a spare piece of fabric or paper towel and then quickly and lightly swipe the paint across the project you are printing.
Easy peasy. Adds color and depth. Plus it's a relief from the graphic nature of Thermofax Screen Printing.

I gave them a whirl in the dryer for about 20 minutes to heat set the paint. Ironing seemed like a poor idea. It was noisy but I'm pretty sure it did the trick. Watch the heat setting, I went the medium route. (You could also let the paint cure for about a week to make it permanent. But who has time for that?? Try the dryer.)
In all honesty, this kind of project is why I love Thermofax Screen Printing so much. I did it on the fly, in the spare seconds I had in the day and just rolled with it.
If you're interested in future project suggestions like this one, please swing by the Thermofax Screen Printing Facebook page and give it a "Like!" so you don't miss anything. And if you print your shoes, please send me a picture at FibraArtysta@earthlink.net and I'll post it to the Facebook page for everyone to admire! :)
5 comments:
Genius... gonna Pin this tute, people will love it!
Them shoes are wonderful! Next time maybe don't make them match.
ADORABLE!!! Just like you!!!
This is such a fun idea. I'm about to run errands and just added canvas tennis shoes to my list. Thanks!!
Print the box is the trend of many stores, businesses to promote the brand to potential customers.
In hộp đựng rượu
in hộp đựng giày carton hà nội
In vỏ hộp đựng giày
in vỏ hộp
Post a Comment