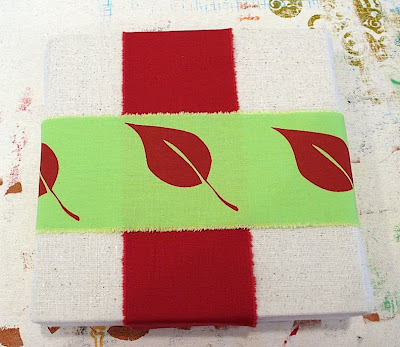
Yesterday we took at look at printing our own ribbon. Today, we're going to put that ribbon into action. There are a lot of different ways you can use it but since I'm a complete fiber addict (and I'm not sorry either), I wanted to find an easy way to wrap presents with fabric.
So Part 2 of our art of gift wrapping craft tutorial series is about wrapping gifts with fabric.
We're going to take a look at how to do this:

I have to admit that I fiddled with this for a while trying to find an easy way to make the fabric do my bidding. Its not always that cooperative. I'm a cotton girl, I imagine if you used something more mold-able like taffeta (now there's an idea! I wonder how that would work??), then it might be a little easier.
Cotton is floppy and I'm not about to flail around the studio with a can of spray starch so I sat down and had a little talk with it. (Fabric is amazingly unresponsive, by the way.)
Admittedly, it would have been simple to just sew a fabric tube and gather the ends up in a bunch and tie it off with string. But I wanted it to look like traditional wrapping. I don't want to admit how much fabric I mangled to get to what I came up with. But I've got a good little method now and I'm passing it along in an effort to save any more fabric from needlessly being tortured.
Here we go!
Step 1
The first thing I found is that taking the time to be picky about measuring how much fabric you actually need not only keeps your package looking neat but prevents you from wanting to throw the box on the ground and stomp up and down on it out of spite. (No, I didn't do that, why do you ask?)
So we're going to be particular and measure everything out. I made a little diagram so you can follow along easier:

So bear with me through the first couple of steps. They may seem tedious but trust me, they save a lot of grumbling later on.
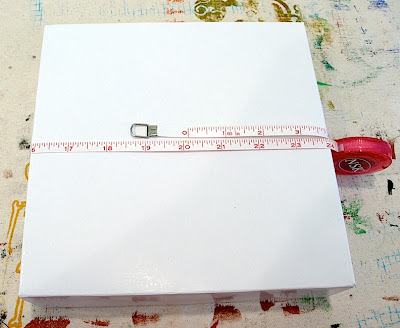
The first measurement is measurement A, which is the perimeter of the box. Use a soft tape measure and wrap it around your box. Add 1/4" to this measurement - this is the length of the fabric.

For my box, the fabric length will be 20.25".
**Note: My box is square so it doesn't matter what side I measure for Measurement A. If you are wrapping a rectangular box, follow the diagram shown above.
* * * * * * * * * * * * * * * *
Step 2
With a regular straight ruler, take measurement B, which is the length of your box. Measurement B on my box is 8".
We're also going to take note of how deep our box is:

My box is 2" deep. Subtract 1/4" off this measurement, this will reduce bulk when you are folding the fabric.
For my box, this measurment is 1.75". But, as boxes usually go, there are two sides like this where the fabric will be folded down during wrapping so we need to multiply that times 2.
1.75" x 2 = 3.5"
Add 3.5" to the length of the box (which for me is 8") and the total width of the fabric I am cutting is 11.5" wide.
* * * * * * * * * * * * * * * *
Step 3
Now we have the measurements for our fabric.
Just to recap, the fabric I need to cut for my 8" square box is 20.25" long x 11.5" wide. (Are you still with me?)

At this point you can screen print your fabric if you want to. I chose to leave mine alone since I love the look of osnaburg and I wanted the screen printed ribbon to be the focal point but grab yourself a thermofax screen and some paint, and go to town on it!
Print your image and allow it to dry completely before you move on to the next step.
* * * * * * * * * * * * * * * *
Step 4
Fold your fabric in half lengthwise. If your fabric has a print on it, fold it right sides together. Stitch the ends together 1/4" from the edge.

And yes, it would be quicker on the sewing machine. I'm a hand stitcher, so I went for it.
(As a side note, I really like using upholstery/doll making needles for hand stitching with embroidery thread. It reduces the fatigue on my fingers and wrist since there is more needle to hold on to. Love it.)

* * * * * * * * * * * * * * * *
Step 5
Turn your fabric tube right side out. Slide your box into the tube:

Center your box in the fabric tube by folding the sides down on each end as you scoot it along. The fabric should cover the end but not reach the bottom edge. It doesn't have to be perfect, just make an effort.
* * * * * * * * * * * * * * * *
Step 6
Now remember at the beginning how I said I didn't want to just sew a fabric tube and shove the box in it? And now we've done just that? (I can feel you all shaking your heads at me.)
Here is where we start to make it look like a traditionally wrapped package.
Fold the fabric down on the sides and secure it with a small piece of masking tape. Yes, you read that right - masking tape:

Regular scotch tape doesn't work. Masking tape has enough tack to hold the fabric still.
I considered pins but blood loss while opening a gift is generally frowned upon. I also tried gluing and stitching but then I realized that, while the wrapping looked lovely, I'd actually like the gift recipient to be able to get into the package. So my solution was masking tape.
Make the pieces small. They'll be covered when you fold the rest of the fabric up.
My goal is to wrap it in a way in which all the packaging can be slid off rather then cut.
* * * * * * * * * * * * * * * *
Step 7
See? Hidden tape:

Pin the fabric in place for the moment.
* * * * * * * * * * * * * * * *
Step 8
Now the fun part! Grab some ribbon that you made from the last tutorial and wrap it around your package. Cut it so that the ends overlap but a little more then a quarter of an inch:

If your box is a big one or you have lots of little pieces of ribbon left, make them in to a single longer ribbon by gluing or sewing the ends together.
Consider mixing ribbons - different colors, different widths, printed and unprinted. Don't feel like you have to use the same ribbon for the whole box - be creative!
* * * * * * * * * * * * * * * *
Step 9
Secure the ribbon with stitching (and yes, this time you have to do it by hand) or fabric glue. Glue is okay this time since you'll be able to slide the ribbon off the box.
Hold the ribbon taught so that there isn't any slop that could cause it to fall off on its own.

* * * * * * * * * * * * * * * *
Step 10
Repeat Step 9 for the second ribbon. Center the printed portion if you like so that it is the star:

* * * * * * * * * * * * * * * *
Step 11
I decided to add a little bit of variety by weaving smaller ribbons under the red one and securing them in the back like the others.

This also took care of the pesky loose edges from back in Step 7.

If you don't want to basket weave your ribbon and you still have to contend with those loose corners, take a couple quick stitches in matching thread to hold them in place. These stitches will be easy to snip during unwrapping because they'll be on top.
And there you have it!
I really like this method of wrapping. It makes me want to pet the present. And its a neat, modern yet cozy presentation. I'm digging it.
I'm sure you've noticed that I didn't add a bow. I'm not much of a bow person when it comes to gift wrapping. I prefer a cleaner look. But that doesn't mean you can't do it. I thought this video was a good one (and use your screen printed ribbon while you're at it!):
Go forth, raid your fabric stash, wrap gifts and have a wild time!
The next tutorial, Part 3: Screen Printing Your Own Paper will be posted on Monday November 15. Tomorrow is Short Story Sunday so we'll be pausing our gift wrapping madness for that.
Enjoy!

3 comments:
very nicely and neatly done. I agree about bows and the woven ribbon is a very exciting design option! Thanks
Completely adorable, Lynn!
Are you going to bring a sample to the meeting tonight? I'd love to see it in person!
Post a Comment