13 November 2010

craft tutorial: the art of gift wrapping part 2

And the gift wrapping madness continues!

Yesterday we took at look at printing our own ribbon. Today, we're going to put that ribbon into action. There are a lot of different ways you can use it but since I'm a complete fiber addict (and I'm not sorry either), I wanted to find an easy way to wrap presents with fabric.

So Part 2 of our art of gift wrapping craft tutorial series is about wrapping gifts with fabric.

We're going to take a look at how to do this:


I have to admit that I fiddled with this for a while trying to find an easy way to make the fabric do my bidding. Its not always that cooperative. I'm a cotton girl, I imagine if you used something more mold-able like taffeta (now there's an idea! I wonder how that would work??), then it might be a little easier.

Cotton is floppy and I'm not about to flail around the studio with a can of spray starch so I sat down and had a little talk with it. (Fabric is amazingly unresponsive, by the way.)

Admittedly, it would have been simple to just sew a fabric tube and gather the ends up in a bunch and tie it off with string. But I wanted it to look like traditional wrapping. I don't want to admit how much fabric I mangled to get to what I came up with. But I've got a good little method now and I'm passing it along in an effort to save any more fabric from needlessly being tortured.

Here we go!


Step 1

The first thing I found is that taking the time to be picky about measuring how much fabric you actually need not only keeps your package looking neat but prevents you from wanting to throw the box on the ground and stomp up and down on it out of spite. (No, I didn't do that, why do you ask?)

So we're going to be particular and measure everything out. I made a little diagram so you can follow along easier:


So bear with me through the first couple of steps. They may seem tedious but trust me, they save a lot of grumbling later on.

The first measurement is measurement A, which is the perimeter of the box. Use a soft tape measure and wrap it around your box. Add 1/4" to this measurement - this is the length of the fabric.


For my box, the fabric length will be 20.25".

**Note: My box is square so it doesn't matter what side I measure for Measurement A. If you are wrapping a rectangular box, follow the diagram shown above.


* * * * * * * * * * * * * * * *

Step 2

With a regular straight ruler, take measurement B, which is the length of your box. Measurement B on my box is 8".

We're also going to take note of how deep our box is:


My box is 2" deep. Subtract 1/4" off this measurement, this will reduce bulk when you are folding the fabric.

For my box, this measurment is 1.75". But, as boxes usually go, there are two sides like this where the fabric will be folded down during wrapping so we need to multiply that times 2.

1.75" x 2 = 3.5"

Add 3.5" to the length of the box (which for me is 8") and the total width of the fabric I am cutting is 11.5" wide.

* * * * * * * * * * * * * * * *

Step 3

Now we have the measurements for our fabric.

Just to recap, the fabric I need to cut for my 8" square box is 20.25" long x 11.5" wide. (Are you still with me?)


At this point you can screen print your fabric if you want to. I chose to leave mine alone since I love the look of osnaburg and I wanted the screen printed ribbon to be the focal point but grab yourself a thermofax screen and some paint, and go to town on it!

Print your image and allow it to dry completely before you move on to the next step.


* * * * * * * * * * * * * * * *

Step 4

Fold your fabric in half lengthwise. If your fabric has a print on it, fold it right sides together. Stitch the ends together 1/4" from the edge.


And yes, it would be quicker on the sewing machine. I'm a hand stitcher, so I went for it.

(As a side note, I really like using upholstery/doll making needles for hand stitching with embroidery thread. It reduces the fatigue on my fingers and wrist since there is more needle to hold on to. Love it.)


* * * * * * * * * * * * * * * *

Step 5

Turn your fabric tube right side out. Slide your box into the tube:


Center your box in the fabric tube by folding the sides down on each end as you scoot it along. The fabric should cover the end but not reach the bottom edge. It doesn't have to be perfect, just make an effort.


* * * * * * * * * * * * * * * *

Step 6

Now remember at the beginning how I said I didn't want to just sew a fabric tube and shove the box in it? And now we've done just that? (I can feel you all shaking your heads at me.)

Here is where we start to make it look like a traditionally wrapped package.

Fold the fabric down on the sides and secure it with a small piece of masking tape. Yes, you read that right - masking tape:


Regular scotch tape doesn't work. Masking tape has enough tack to hold the fabric still.

I considered pins but blood loss while opening a gift is generally frowned upon. I also tried gluing and stitching but then I realized that, while the wrapping looked lovely, I'd actually like the gift recipient to be able to get into the package. So my solution was masking tape.

Make the pieces small. They'll be covered when you fold the rest of the fabric up.

My goal is to wrap it in a way in which all the packaging can be slid off rather then cut.


* * * * * * * * * * * * * * * *

Step 7

See? Hidden tape:


Pin the fabric in place for the moment.


* * * * * * * * * * * * * * * *

Step 8

Now the fun part! Grab some ribbon that you made from the last tutorial and wrap it around your package. Cut it so that the ends overlap but a little more then a quarter of an inch:


If your box is a big one or you have lots of little pieces of ribbon left, make them in to a single longer ribbon by gluing or sewing the ends together.

Consider mixing ribbons - different colors, different widths, printed and unprinted. Don't feel like you have to use the same ribbon for the whole box - be creative!

* * * * * * * * * * * * * * * *

Step 9

Secure the ribbon with stitching (and yes, this time you have to do it by hand) or fabric glue. Glue is okay this time since you'll be able to slide the ribbon off the box.

Hold the ribbon taught so that there isn't any slop that could cause it to fall off on its own.


* * * * * * * * * * * * * * * *

Step 10

Repeat Step 9 for the second ribbon. Center the printed portion if you like so that it is the star:


* * * * * * * * * * * * * * * *

Step 11

I decided to add a little bit of variety by weaving smaller ribbons under the red one and securing them in the back like the others.


This also took care of the pesky loose edges from back in Step 7.


If you don't want to basket weave your ribbon and you still have to contend with those loose corners, take a couple quick stitches in matching thread to hold them in place. These stitches will be easy to snip during unwrapping because they'll be on top.

And there you have it!

I really like this method of wrapping. It makes me want to pet the present. And its a neat, modern yet cozy presentation. I'm digging it.

I'm sure you've noticed that I didn't add a bow. I'm not much of a bow person when it comes to gift wrapping. I prefer a cleaner look. But that doesn't mean you can't do it. I thought this video was a good one (and use your screen printed ribbon while you're at it!):


Go forth, raid your fabric stash, wrap gifts and have a wild time!

The next tutorial, Part 3: Screen Printing Your Own Paper will be posted on Monday November 15. Tomorrow is Short Story Sunday so we'll be pausing our gift wrapping madness for that.

Enjoy!

12 November 2010

craft tutorial: the art of gift wrapping part 1

There's no denying it - the holiday season is about to hit us a like a runaway train. I can feel my to-do list growing to epic proportions already.

When I was in the store the other day I wasn't really surprised to see all the Christmas stuff out. Its everywhere - crowding the aisles, hanging from the ceiling, decorating every end cap. I spent some time browsing through the gift wrapping section. It never ceases to give me sticker shock.

As I was standing there looking at a $6 price tag on a roll of wrapping paper that probably wouldn't wrap anywhere near the amount of presents I'll be handing out, I had a big fat "duh" moment - I should make my own wrapping this year! And I could screen print it! (That got me totally hyper about the idea, you know how I love to screen print everything.)

Not only would it make the gifts more unique but it would save me some cash too. When I added up what it would cost me to buy paper, tags, bows and boxes, it came out to more then $30.

Heck, I could buy gifts with that money. Or yarn. (One can never have enough yarn.) Or both. Why should I spend it on wrapping??

So I came home and made a little list to see if it really is more economical to do this on my own. Here's what I came up with:

* brown kraft paper from the $ store = $1
* micro mini thermofax screen = $3
* bottle of paint = $3.50
* one yard of cotton fabric for ribbon = $3
* two yards of osnaburg fabric = $6

That's a total of $16.50. I'd pay less if I used the discount coupons Joann's sends out on the fabric. That would lop off another $3.60 which would bring my cost down to $12.90.

That's less then half the cost of commercial stuff. And in all honesty, that's only if I decide to use both fabric and paper for wrapping. If I chose one or the other, you can knock even more off the cost.

Not too shabby.

I've been puttering around in my studio the past few days coming up with some different things you can do to not only put a unique spin on your gift wrapping this year but to also save a few bucks. I did such a good job that when I was editing the photos, I was a little surprised at how much I had to say on the topic.

So in an effort to keep your eyes from glazing and rolling into the back of your head from boredom, I decided to split the whole thing up into four posts. Here's what I've got for you:

Part 1 - Screen Print your Own Ribbon!

Part 2 - Fabric as Gift Wrapping

Part 3 - Screen Printing Your Own Paper

Part 4 - Sprucing Up Brown Craft Paper

Part 5 - Easy Decorations for Gift Bags

Told you I got carried away. The thing I got to thinking about was that while its true that I do most of my gift wrapping at the holiday season, I give gifts all year round so its something that I could do for all occasions. That makes me happy, knowing that I can do it all myself and not have to depend on finding just the right thing in the store.

I'll be posting them over the next week. Each part will walk you through the steps needed to turn these:


into these:


So without further ado, let's screen print some ribbon!

What you'll need:

* cotton fabric (the cheap stuff will do, you can get it as low as $2.99 a yard - don't forget to use 40% off coupon!) in various colors
* micro mini thermofax screen (you can also use larger sizes if you already have them)
* bottle of paint
* sponge brush


Step 1

Tear or cut your fabric into strips. I tore my strips along the width of the fabric, which was 44". This is a nice length that is reasonable to screen print.

I like lots of colors so I bought quarter yard pieces to get a variety. I like raw edges on fabric so I tore mine but if you like a more finished edge, you could cut them with a rotary cutter, fold under the edges and give them a quick whirl through the sewing machine to create a clean edge.

Osnaburg is a nice fabric if you'd like a natural, organic feel to your ribbon.

I created strips in 1", 2" and 3" widths.

Give your strips a good pressing:


* * * * * * * * * * * * * * * *

Step 2

Lay the fabric strip on your print table and begin printing at the end of the ribbon farthest away from you:

If you need a reminder of basic printing techniques, my basic screen printing video is a good refresher.


* * * * * * * * * * * * * * * *

Step 3

Continue to print down the length the ribbon.


Remember that you are dong repeat printing on these so check the back of your screen frequently for paint splotches:


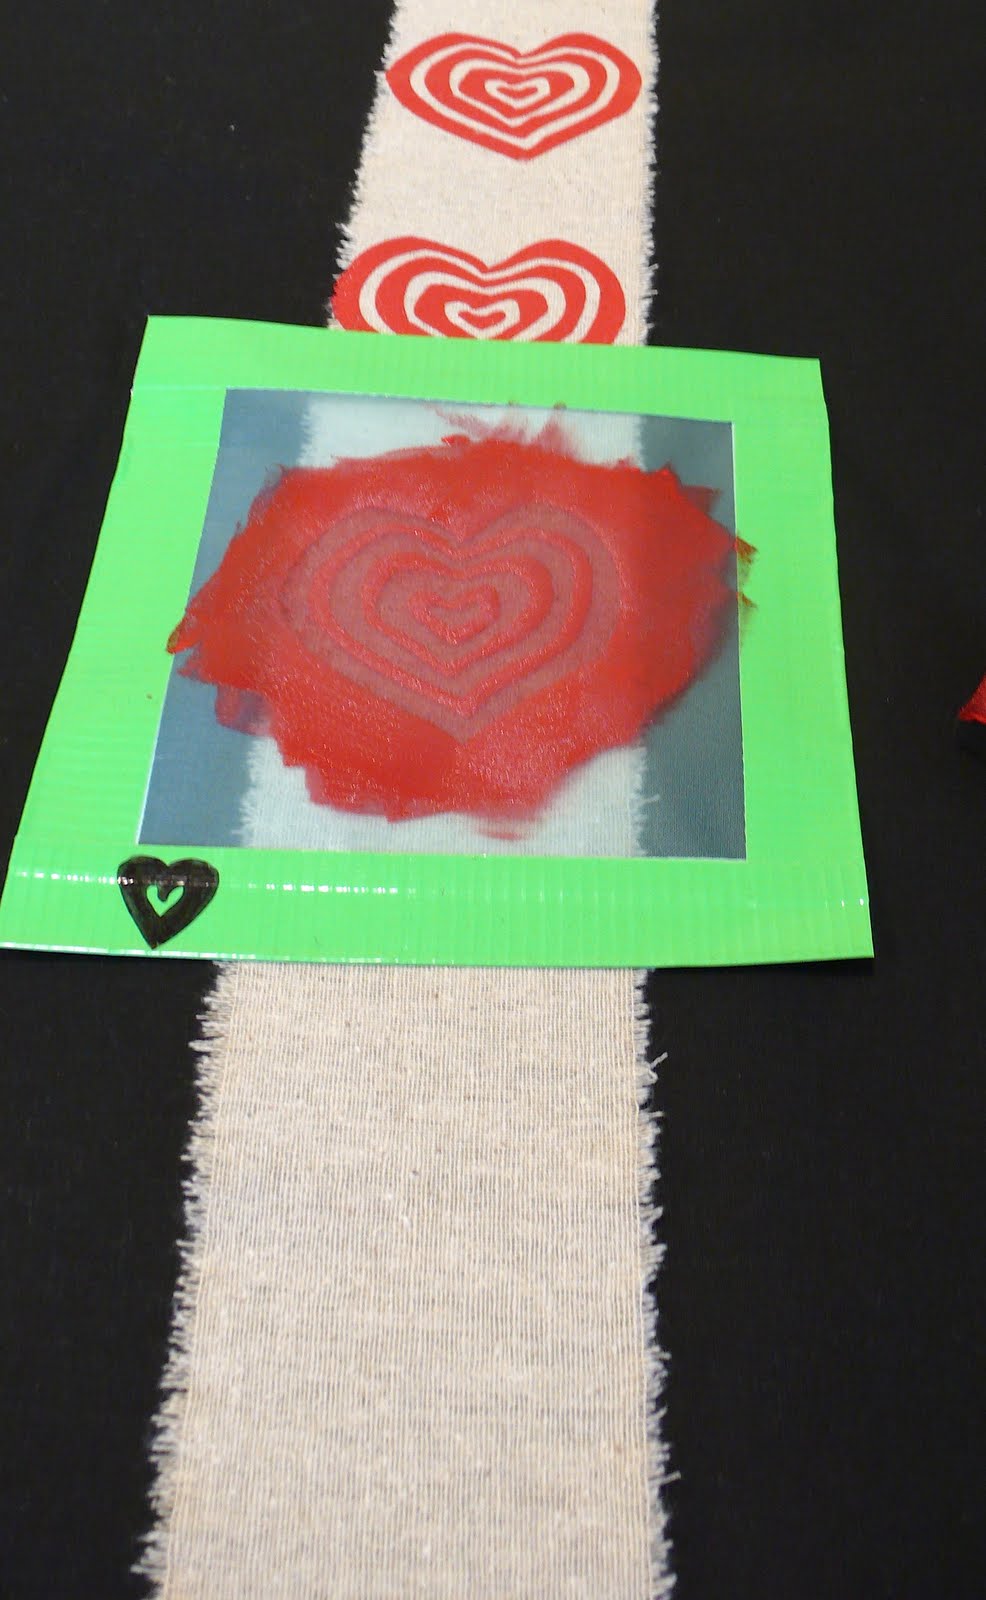
For help with repeat printing, I've got this video for you. (The screen I'm using up above is the nested heart micro mini screen.)


* * * * * * * * * * * * * * * *

Step 4

Print to the end of the ribbon and set it aside to dry! And that's how easy it is!


Other ideas:

Tilt the image to create a more interesting pattern:

(bulb screen)


Alternate different size images:


(tweet & baby tweet screens)


Use a large size screen to print more then one ribbon at a time:


(mod squares screen)


There's really no end to the variety that you can create by printing your own ribbon! I got so excited I can't even tell you how many I printed.

If you want longer lengths of ribbon for those mega size packages, I still recommend printing 44" lengths. You can attach strips together to create longer ones either with some fabric glue or stitching the ends together on the sewing machine.

And that's all there is to this part! Hope you enjoyed it!

Check back tomorrow for Part 2 when we wrap a package in fabric. :)

11 November 2010

pausing for happy things


My mother told me that from the time I was little, I was a quiet studious kid. I'd sit and watch everything around me. I'd also be the kid who would crawl behind the dresser so I could see what was there or the one sitting on the floor pulling apart the easy bake oven to try to figure out how it got stuck together.

Its not a wonder that I decided to go into engineering when the time came for me to choose a career. Its been a balancing act, trying to make this engineer brain and this art brain live peacefully together. They don't always get along but I find that it makes for an interesting combination that never really leaves me bored.

The problem is that I love working on things. I've always got several projects going at one time, I'm not happy unless my schedule is full. At the beginning of this year I decided that my work-a-holic self needed tiny reality checks. That I needed to be reminded to pick up my head every once in a while from the work load and take a look around me to see what was going on.

I decided to start the 365 Happy Things Project.

Its a simple idea: take a picture everyday of something that makes me smile and put it up on a blog.

I've mentioned it here time and again but I think it bears repeating again. Especially this time of year when the holidays pump our to-do lists up to epic proportions. I'm a wee bit behind on my count. I needed to take a little hiatus this past fall when things got too busy for me to see straight. But now I'm back at it and its a little bright spot in my day when the picture goes live.

I got to thinking today about the project and all the things that I'm working to accomplish in my life. And I realized that they are related. I work to accomplish my goals so that I can build a life that I enjoy, that satisfies, that makes happy.

So as we head on into the craziest time of the year, I thought I would do a little recap of some of my favorite happy things that I've posted so far. Please go visit the project's blog, its a friendly place that always likes new friends.


09 November 2010

a chance to win a free screen & paint!

Do you know Jo and Dylan from Cart Before the Horse? If you don't, then you've no idea what you are missing!

They are just about the most talented doll artists on the planet. They are quirky and creative and very positive happy people. (Can you tell I'm a fan??)

I sent Jo a thermofax screen to tinker with and this is what she created:


My heart just goes pitty pat at the sight of that jolly skelly. Isn't it great!

I mentioned that I thought it would be fun if she offered a giveaway for a screen and a bottle of paint for her readers. So she's doing just that!


All you have to do is pay a visit to her blog and leave a comment on this post. (Trust me, you'll visit her blog often, its super fun so be sure to add it to your favorite blog links.) You've got until Sunday November 14, 2010 to leave her a comment and then she'll choose a winner. Then you'll get to tell me what screen and paint you want!

So don't waste time, get on over there and comment for a chance to win!


**Photos and graphic posted here with permission.

08 November 2010

shop update - the obsession continues


I am a thermofax screen printing addict. I'm sure you hadn't noticed. I mean, its not like I never talk about it here or anything. (Insert heavy sarcasm...)

I popped some new designs in the shop last night and wanted to help share the obsession by giving them a wee little mention here.


Screen printing really doesn't get any easier then this. I have several customers who purchase screens from me after buying a home screen printing system (we won't mention any names) and finding it was hard to work with.

I've taken alllll that work out of it for you. You can screen print your tote bags. Your clothes. Your curtains. Your greeting cards. Anything that will stand still and lacks the ability to complain (which is the polite way of saying you may want to avoid printing on living things, they generally don't like it).

Go forth. Screen print the world with reckless abandon. Be wild. Join the obsession!

07 November 2010

where i stand sunday


The scent of autumn is what draws me into the season the most. Floral margins, dust from cracked leaf edges, dampness that draws the smell of the earth to the surface. The perfume of decay is intoxicating. Its when I'm most aware of the world around me, when the ground and trees throw themselves into the business of resting, of receding for the long winter.


Where I Stand
is an ongoing photo essay examining the different places I spend my life standing. Too often we take for granted the everyday places we spend our lives walking on. The ground we tread on has its own stories to tell. (The project is now in Year Three. Year One and Year Two can be found here.)

05 November 2010

taking a breather

I admit it - I am a workaholic. When I set my mind to accomplishing a goal, I dig my heels in and allow the obsession to take hold and often work myself into the ground to accomplish it.

Its part of my nature and while its often not a bad thing that I am so focused, it means I can easily burn myself out. I'm sort of heading that way. I've been working like a fiend to build up my thermofax screen business and I'm in the midst of prepping things for another craft tutorial and another big shop update.

Its turning me into a bit of a studio troll.

I decided that a bit of human interaction was in order. Kismet was on my side because just as I was thinking that, I got the newsletter from Art & Ideas, a local art gallery run by Shaqe Kalaj. Leann first introduced me to her when she was putting on a show of her woodcuts.

I fell in love immediately. I'm a huge fan of monoprints and block printing.

Shaqe teaches classes and she has one on Thursday evenings that are mini intro classes. Last night she ran one on lino cutting and I jumped at the opportunity to take something with her.

I've done some block printing in the past but its been a while and there were things that I did that I'm sure could have been done easier. So I signed up for the class and learned quite a bit in that ninety minutes.

One of the things that Shaqe does is she colors the block with sharpie so you can actually see where you are carving. I thought this was genius. Since I normally just carve freeform, it was tremendous help to be able to see the design develop as I went along rather then crossing my fingers and hoping I was getting it right:


I also liked the way she showed us to burnish the image - just a simple plastic spoon:


I did a few prints and found that I either was putting too much ink on the block or not enough:


I think its because I was using black ink to print and the block was colored black for carving. I'm going to try printing this design with some red block printing ink I have lurking about the studio and see if I can get a more even print. I just couldn't see where I was putting the ink with everything being the same color.

I like coloring the block for carving so I'll probably use an obnoxious color like hot pink on future ones. I'm not likely to print hot pink prints.

The carving material she gave us was thick enough that we could carve on both sides. Here is my second design:


I'm not done picking at it yet. I'd like to carve some more out of it and do some more printing.

I'm really enamored with this, I want to order some more carving blocks. I'm undecided if I want to just keep going with the line compositions or actually focus it in on a specific thing. The tedious detail of carving all those little lines is really appealing to me.

Another obsession begins...

01 November 2010

starting with intention

Sometimes I feel like my artwork is like the jewelry they show on the home shopping networks. It looks all grand and big on the screen so you order it and dream about how impressive you'll look strutting around with it. Then you get it and its this little thing that fits neatly in the palm of your hand and all you can think is "What the hell?"

This has happened several times when people first see my website and then see my work in person. (Never mind that the dimensions are listed, I'm guilty too of not really paying attention to those things either.)


on the line 2
7" square art quilt on 8" square canvas


I make no apologies for working small. Its been a matter of much debate to many fiber artists and I'll be honest, it irritates the hell out of me. Ever see the Mona Lisa in person? (And no, I'm not comparing myself to Da Vinci.) Its only 30" x 21" yet when I saw it at the Louvre when I was in Paris, the crowd was twenty people deep. I couldn't get near it. And I don't recall anyone saying, "Boy, that Da Vinci was one lazy painter. If he was a real artist, he would have made that bigger."

Small work. Big impact. Get the point?

I've made specific efforts to keep my work from looking like pot holders. I don't bind it. That screams quilt to me and since, for me, stitching is not a structural part of my work (its just there for looks), I abandoned the idea of binding a long time ago. I also like the little bit of fraying that happens around the edges. The rawness speaks to the nature of fabric and I dig that.

Lately I've been placing my pieces on canvas. I love how it looks (and will be posting a tutorial on how I do it, I've had a few questions about it) and I think it elevates the work. You can use the canvas as an additional design element and it makes hanging the work so much easier. Not to mention it gives it a solid presence on the wall since it mimics a frame.

Now, with all the being said, I'm going to completely contradict myself. Part of me has always longed to make a grand work that could cover the wall of my bedroom.

Something just for me, no show deadline, massive in size. Just to see if I can, just to see how it would effect my work flow, just to see if my style could stand up to being blown up so large.

Some of the factors that have kept me from taking the plunge are:

1. I hand stitch my work. I don't plan to alter that. Not only because my sewing machine can be the spawn of the devil, but because machine stitching doesn't feel like my style. The crooked uneven hand stitches are me.

2. Work space. I'm beginning to think that if I hang the work on my design board, I can stitch on it that way. (Can you feel the crazy already creeping in?)

3. I work abstract. I always have a focal point in my work but larger works demand more. This could be tricky.

Still, I'm curious to see if it could work. I look at Kathy Nida and Linda Colsh (two of my favorite artists) and the grandness of what they produce is so inspiring.

I've got a hunk of black felt that measures 36" high x 48" wide tacked up on my design board right now. (I don't use traditional batting, I use felt for my middle layer.) It seems massive. The largest thing I've ever made to date is 20" x 24".

I don't have a subject yet, I don't have any idea what fabric I want to use. I think I want to print some new stuff for this one. Maybe do some deconstructed printing.

But I have intention and here's hoping that's enough to figure out the rest.

Game on Behemoth, you and I are going to duke it out.